WordPress is the most popular blogging tool on the internet accounting for approximately 25%ǂ of all sites. One of the biggest threats to wordpress is brute force cracking attempts on the login page (wp-login.php) and admin (wp-admin/*) pages. There are various methods of protecting these pages including utilising wordpress plugins or applying security controls at the web server (ie within apache/nginx for example). The problem with these methods is they are utilizing server resources meaning that potentially a hacker could cause a denial of service (DOS) through their brute force attempts.
In this article we are going to describe how to protect the wordpress login page using AWS Web Application Firewall (WAF). The advantage of using a WAF for protection is that the security safeguards are completely abstracted from the web server(s) and instead placed at the point of entry into the application as can be shown in the diagram below:
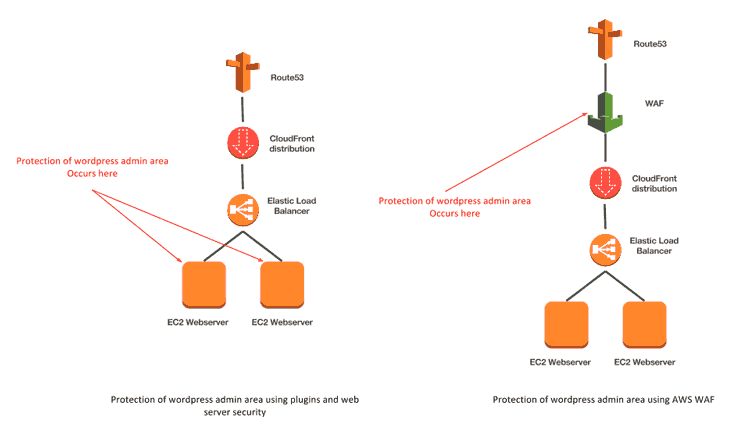
Not only does this implementation save precious server resources but the scalable nature of the WAF service also means you are better protected from DDOS attacks. Thus if an attacker attempted a brute force attempt on the login page it is the WAF service that is denying the requests (potentially many of them) rather than your web servers.
Note: We would not recommend completely replacing your existing wordpress security mechanisms with the method described below but instead use alongside them to provide a defence in depth model of protection.
Before we begin let us quickly summarise how AWS WAF works. This is described eloquently on the AWS blog:
“You simply create one or more web Access Control Lists (web ACLs), each containing rules (set of conditions defining acceptable or unacceptable requests/IP addresses) and actions to take when a rule is satisfied. Then you attach the web ACL to your application’s Amazon CloudFront distribution”
In the example below we will show how to create an access control list (ACL) that contains a rule with a match condition that, when satisfied, will block access. We will show how the rule can be tested and then how it can be applied, in production, to a cloudfront distribution. Finally we will implement a custom error page that will be shown to users when they are blocked from accessing the protected resources.
Before we begin with the example below several prerequisites must be satisfied:
- We must already have a functioning wordpress installation and this must be fronted by AWS Cloudfront
- We must have an IP address or IP range that will form our “allow” list
- For the custom error page you must either create one or have an existing one that you wish to use (which can be part of your distribution)*
* This is only required if you want a custom error page. If you are happy with the standard cloudfront error page you may ignore this prerequisite.
OK, let’s get started….
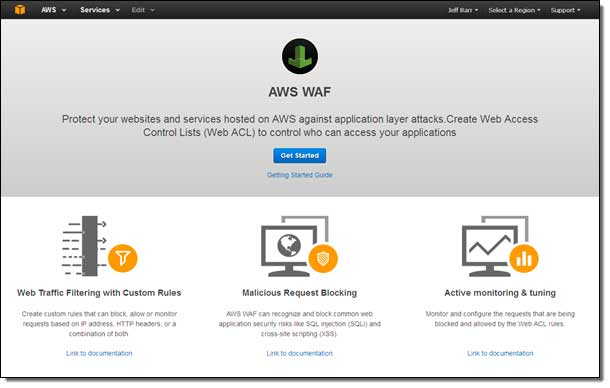
From the WAF home page hit “Get Started”
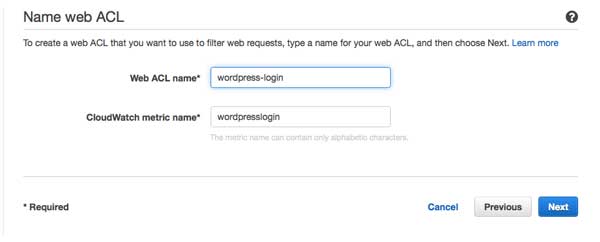
Create a new ACL by clicking “Create web ACL” and provide a meaningful name (I’ve called this wordpress-login)
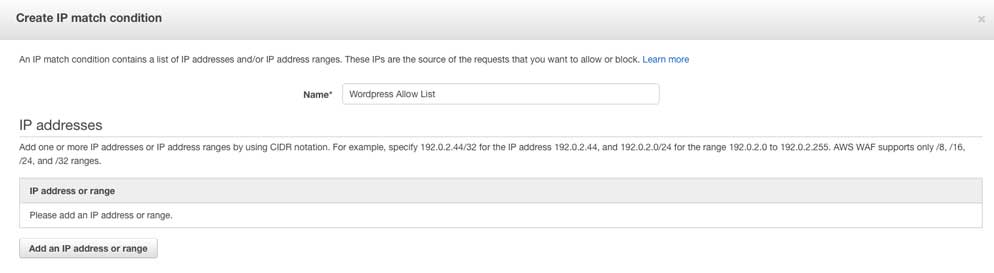
On the next screen you should have the option to create your conditions. We need to create two match conditions; one for the IP address range that constitutes our allow list and a second to match the page that we wish to protect. In this case wp-login.php.
Firstly go ahead and create an ip match condition. In this example I have used the title “Wordpress Allow List” for the IP ranges (be sure to enter your IP address range into the condition)
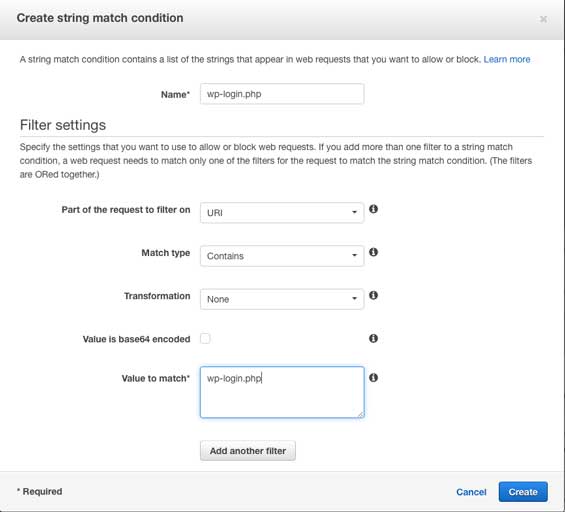
Once complete create a second “string match condition” that matches the URI containing wp-login.php. I’ve called this condition “wp-login.php”
Now that we have our two conditions we must combine them into a rule that describes the action to take when all of the conditions of the rule are met. In this example we only need a single rule that in plain English will say “block the request if the user is trying to access wp-login.php and does not come from IP address x.x.x.x/x” (where the IP address x.x.x.x/x is the ip range you specified)
To create this rule click “Create Rule” from the rule page ensuring you add the two conditions (I’ve named this rule wp-login-block) that state
- does match wp-login.php
AND
- does not originate from your IP list
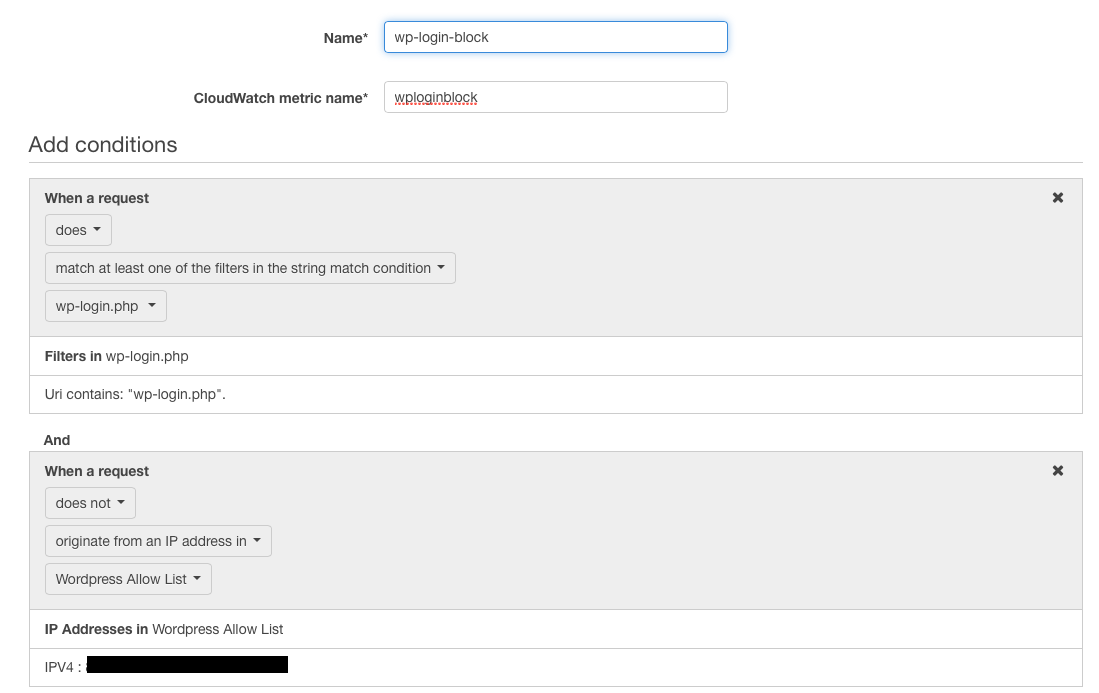
Note that for security’s sake I have masked the IP address that I use
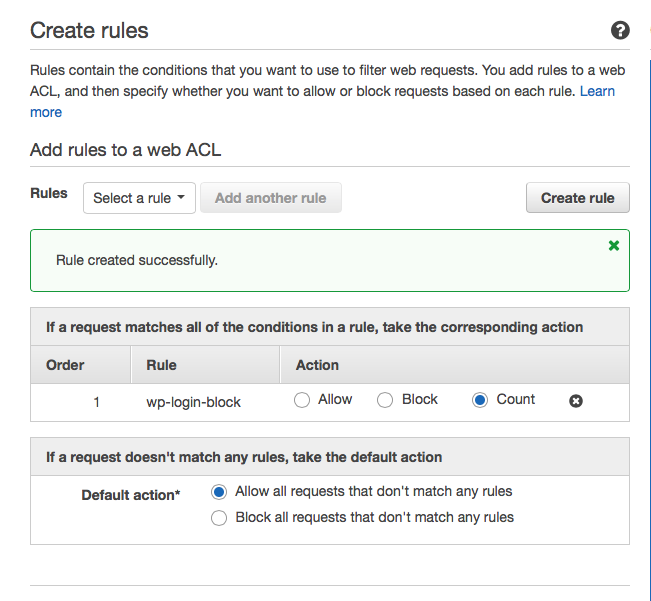
Once we’ve created the rule we need to setup the actions to take if the conditions in the rule are met. Now for production we would set this rule to block and the default action would be set to allow. However so that we can test our rule we will set the rule action to “Count” (leaving the default action of allow). This action increments a counter each time our rule is met without actually doing anything, thus allowing us to test the rule without actually impacting the site.
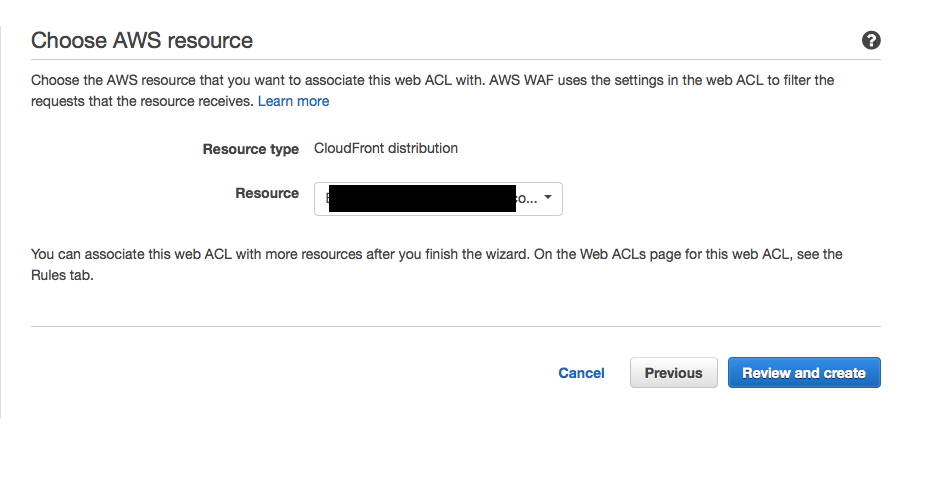
Finally we can assign the rule to a cloudfront distribution at which point it will begin working. On the next screen simply select the distribution from the drop down list in the “Choose AWS resources screen”
Once we hit “Review and Create” we have a working WAF ACL applied to our site. However the rule within the ACL is not actually blocking anything as we have set the action to count. So the next action is to test it by making a couple of valid and invalid requests and observing the results.
From the WAF home screen hit the “Web ACL” option in the left hand menu and then select your ACL and you should be presented with a screen showing a “Requests” and “Rules” tab. From the “Requests” tab we can observe the action being taken for each of our rules (in our case wp-login-block and default_action). To populate this with data complete the following test in each case taking a note of your IP address and the time you made the request
- Attempt to login to /wp-login.php from an IP address that you added to your allow list
- Attempt to login to /wp-login.php from an IP address/network that is not in your allow list
Note that in both cases the request will succeed but the second request should have incremented our wp-login-block rule counter by one. You will need to wait 5-10mins for the data to be populated in the graphs.
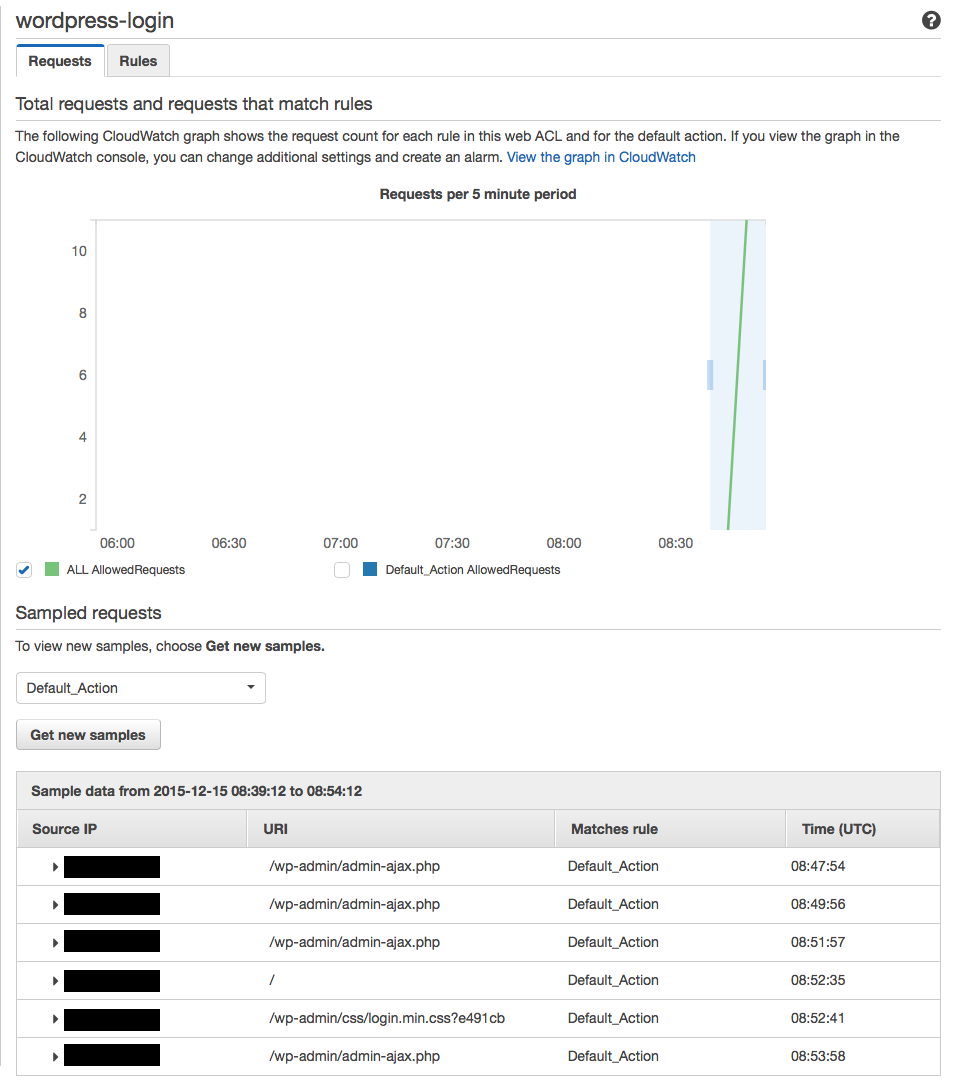
Here is what happened when I tested from my allowed IP. We can see that requests are being processed according to the “Default_action” (which is allow in this case)
And here is what happened when I test from an IP range not in the allowed list (I was using IP 31.109.172.163).
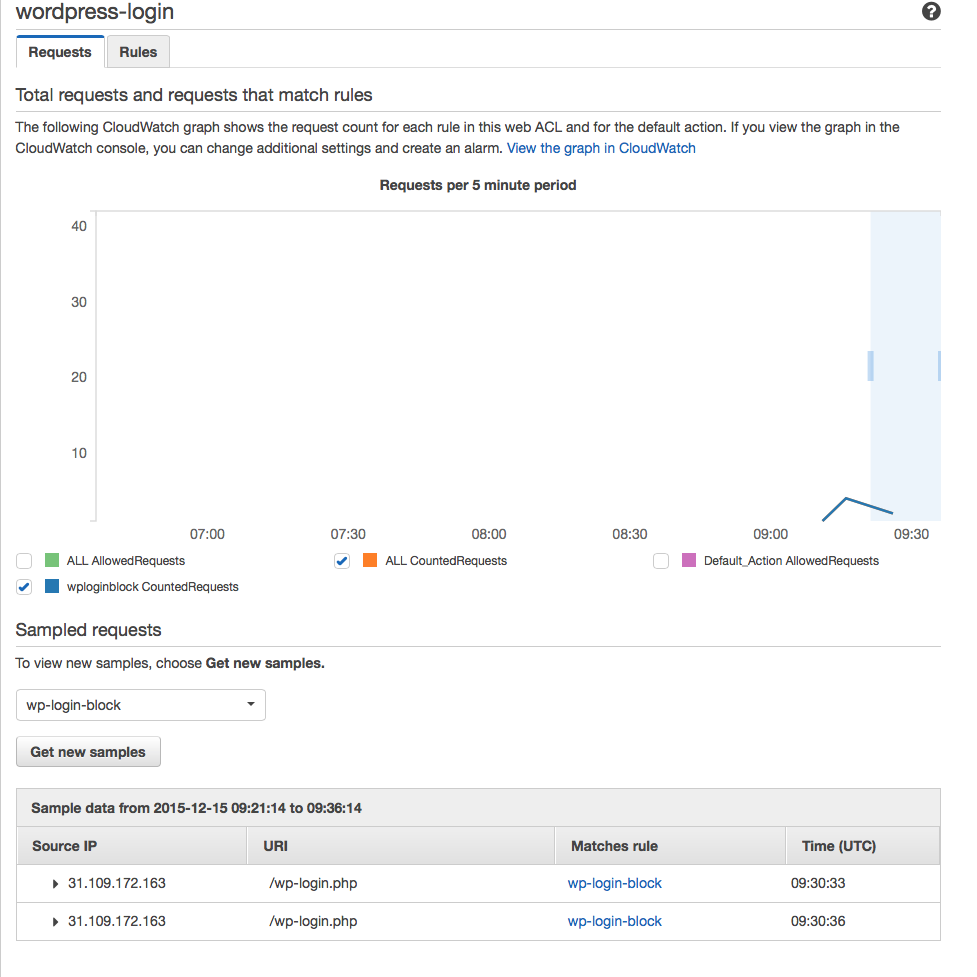
You can see that when I select wp-login-block from the sample requests the count requests have incremented. This proves the rule is working.
Now that we know our rule is working we can update the action so that “count” becomes “block”. From the same screen select the “Rules” tab and then select “Edit web ACL”

From here change the action to “Block”

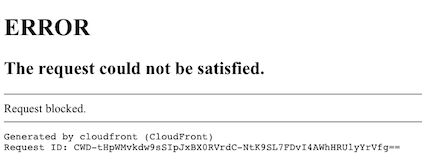
Once you hit update the ACL will be updated with the new action. If you repeat the two tests from above you should reach the wordpress login screen when attempting the first test and now see a screen similar to the one below when attempting the second. This proves the ACL is now working! Well done.
At this point you could stop as your WordPress admin pages are now protected from all IP’s except for those in your allow list. However you may want to make the above default error message from cloudfront a bit more, say, pretty. Perhaps you want to use a custom error page or one that is in keeping with the style of the rest of your site? If so, you can create a custom error page via the cloudfront distribution and redirect users to this.
NOTE: If you update Cloudfront to use a custom error page for a given error (in our case it will be a 403) it will apply to the whole distribution and not just the errors coming from the WAF service. Make sure you understand this before continuing.
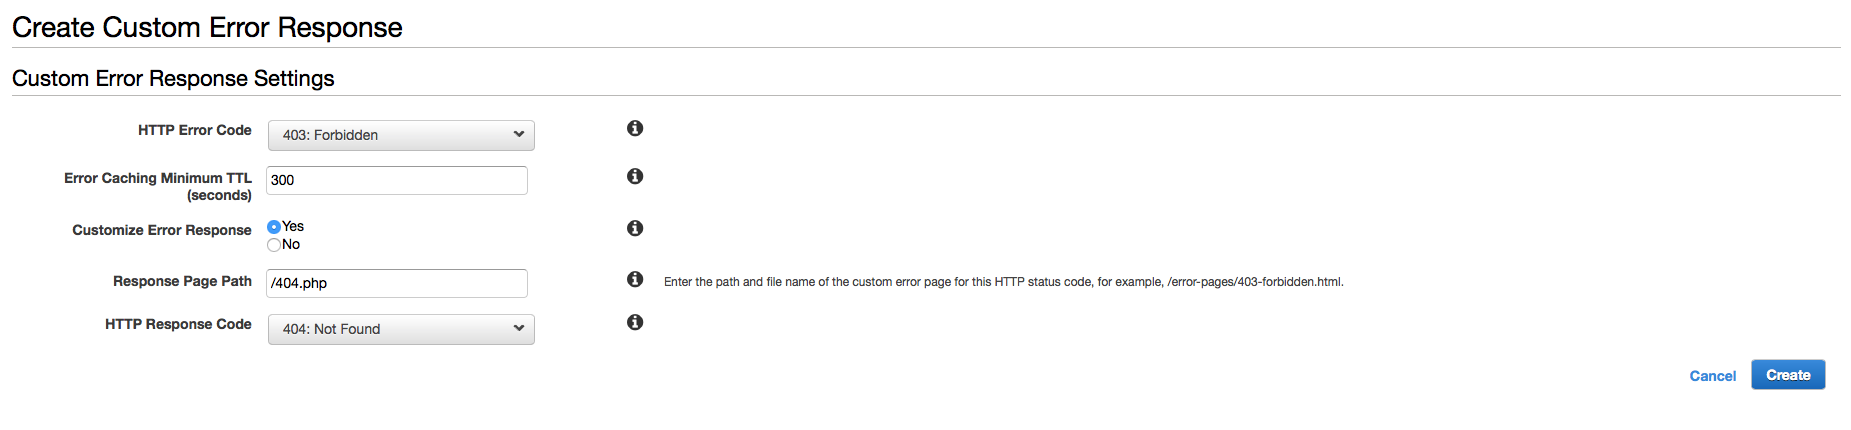
To create a custom error page select Cloudfront in the AWS console, choose the distribution that has your WAF ACL applied, select “Error Pages” and select “Create Custom Error Response”. In the “HTTP Error Code” box select “403 Forbidden” which is the error code that WAF gives for the “Request blocked” message shown above. Leave the caching TTL at 300 and select “Yes” for “Customise Error Response”. At this point you have several options for “Response Page Path” and “HTTP Response Code”. You could point to a custom error page that you have stored in S3 (the AWS recommended way) or to a error page that you already have in your web server distribution. In my case I decided to point to the standard 404.php page that I already had in my distribution and also set the response to 404. This is because it would appear to any user attempting to access the admin area of my wordpress site that the pages simply did not exist. This, to me, was fine and the 404.php page I used already had my sites default styling.
Hit “create” and then you’ll need to wait for the distribution to re-deploy. Once complete attempt to connect to wp-login.php from an IP not in the allowed list (test 2) and instead of the cloudfront “request blocked” message you should now see your default error page which in my case looks like so:
Cool eh?
Now there is a final piece to this puzzle which you may have already thought of and that is “how do we ensure all of our end users are forced through the WAF”? Let me explain.
If you are using an Elastic Load Balancer (ELB) or an EC2 instance exposed to the internet, strictly speaking a user could potentially bypass cloudfront (and thus WAF) by using the public DNS name of your instance or ELB to connect to your site. Now, depending on the way your site is configured they could gain access to a page that you believed had been protected by WAF (because WAF has been bypassed). The way to overcome this is to modify the security group protecting your ELB or instance to only allow inbound access from Cloudfront. The result being that Cloudfront is your only exposed end point. How to do this is beyond the scope of this article but the following blog from AWS explains how this can be dynamically configured using lambda.
So let’s recap what we’ve done in this simple example
- Created an AWS WAF Access control list (ACL)
- Created two match conditions.
- Create a rule containing the match conditions defining how each condition should be satisfied
- Supplied the action to take when the conditions in the rule are met
- Applied the rule to the ACL
- Applied the ACL to a cloudfront distribution
- Created a custom error page for the default 403 message
- Described how to ensure end users are forced through Cloudfront and WAF
So, following these simple 8 steps you can apply an extra layer of security to your WordPress application. Enjoy!
ǂSource: http://w3techs.com/technologies/details/cm-wordpress/all/all
About Hydras
Hydras are a team of cloud consulting experts that excel in architecting and operating secure, automated cloud based solutions built on Amazon Web Services (AWS) with a particular focus on web and mobile. Contact us for help with your AWS projects. We’d love to work with you.