In this article we are going to explain how you can improve the security of your AWS IAM account by enabling Multi-Factor Authentication (MFA) using Google Authenticator in order to access the AWS Management Console
Background
Google Authenticator is a free, popular virtual Time-based One Time Password (TOTP) authenticator that supports the RFC6238 standard, generating six-digit authenticate codes that change every 30 seconds. Using such a device a user may enable two-factor authentication on their AWS account (two-factor authentication can be described as something a user knows (i.e. their password) and something a user has (i.e. an authentication code held on some kind of device)) providing an extra layer of security above and beyond the standard AWS password.
In general there are two types of device for providing TOTP based passwords; hardware devices that consist of a dedicated “token device”, usually in the form of either a key fob or a display card and virtual devices that are smart phones or tablets running the application that supports the token.
Hardware devices are tamperproof, singular and cannot be replicated and are therefore considered more secure than virtual devices that are installed within handheld devices. For that reason we recommend that virtual devices, such as Google Authenticator only be used for protecting non-root level (i.e. IAM) accounts within AWS. If protecting a root (top-level) account we recommend purchasing a hardware device and then locking in a safe until required.
Pre-requisites
In order to be able to configure Google MFA access the following pre-requisites must be satisfied:
- Download and install the Google Authenticator application on your smartphone
- If adding an MFA to your own account ensure you have the correct permissions
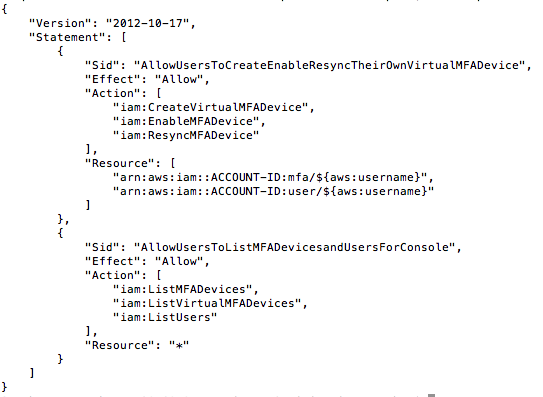
On the final point it should be noted that to add Google Authenticator to an account access to the hardware device is needed. This is because activation requires that two correct token codes be entered into the AWS console. Given this restriction it is often prudent to let users configure their own MFA devices and a policy such as that shown below is a useful minimal set of permissions that will allow a user to enable their own MFA device and resynchronise it without having the ability to delete it or do much else.
Note: In the policy below substitute ACCOUNT-ID for your account id
Configuring Google Authenticator
Assuming you have the correct permissions and device installed complete the following steps to enable it:
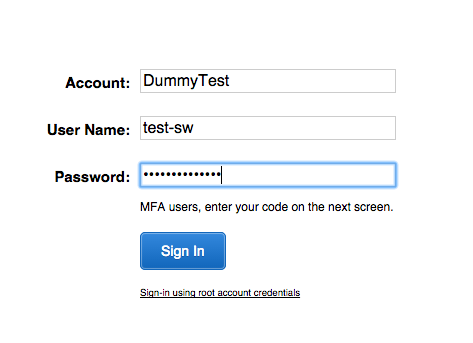
Login to the AWS Management Console and navigate to the IAM console at https://console.aws.amazon.com/iam/
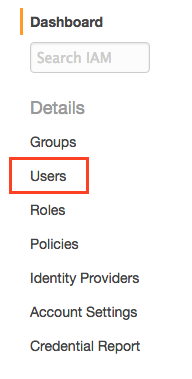
In the left hand navigation pane select Users
In the user list select your username

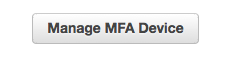
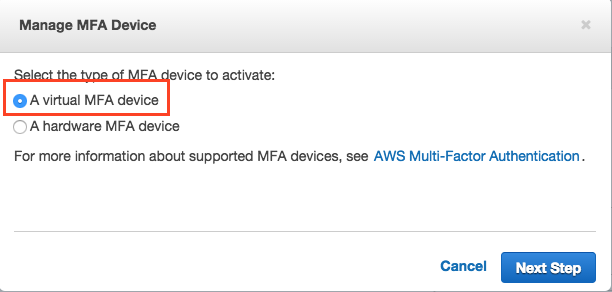
Scroll down to the bottom half of the screen and select Manage MFA Device
Ensure that Virtual MFA Device is checked and hit “Next Step”
If you haven’t already installed Google Authenticator on your smartphone do so when prompted and hit “Next Step”
You will now be presented with a QR code that you can scan using your Google Authenticator application on your smartphone
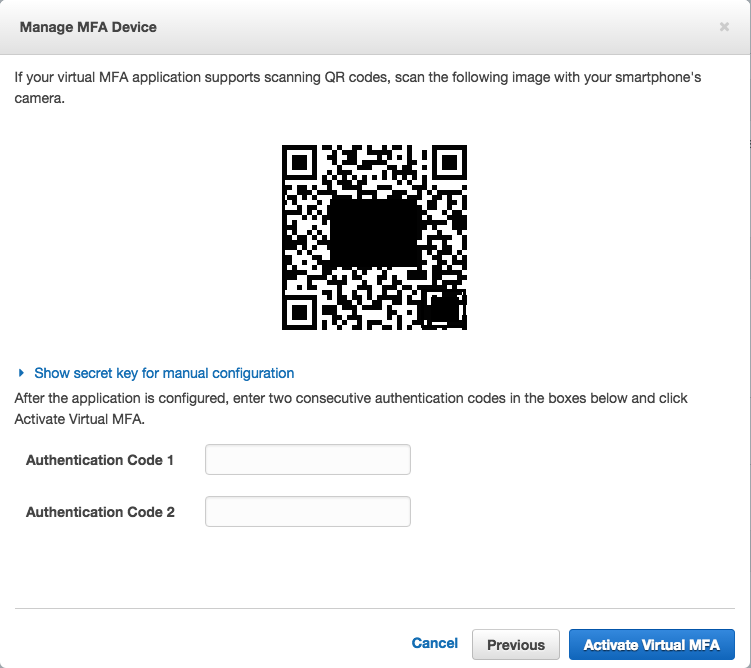
To scan the barcode open your authenticator application (example below is on an iPhone) and click the plus (+) button on the top of the screen

Then click on the Scan barcode entry and this should open up your smartphone camera which you can point at the QR code on the screen to register your device

If, for any reason you can’t use your camera you may register the device manually. In this case simply select Show secret key for manual configuration and you should be presented with a long key number
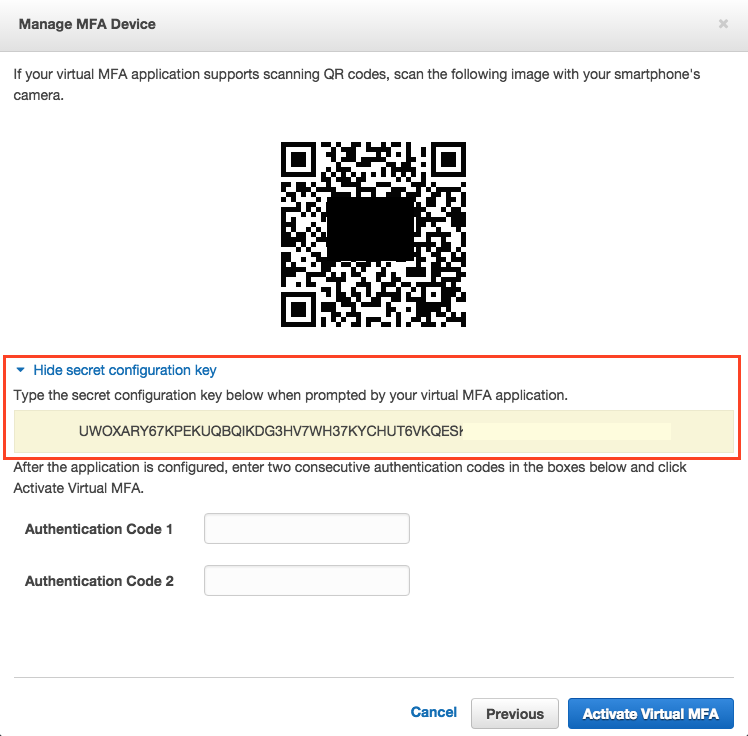
Simply enter this into your phone using the Manual Entry option from the smart device as shown in the above picture
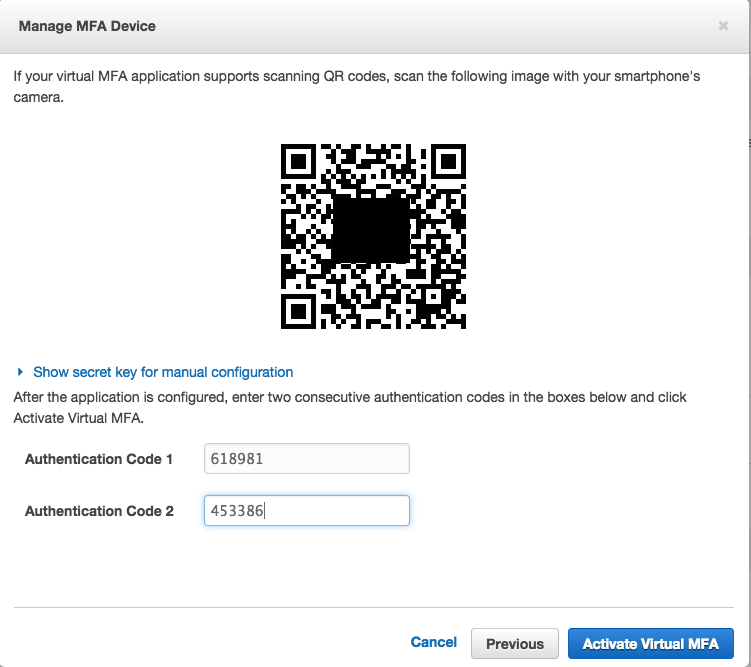
Now that the device has been installed enter the next two 6-digit numbers into the boxes as shown. You’ll enter the first number and wait thirty seconds before entering the next. Once complete hit Activate Virtual MFA
If all has gone well you should be told that your device was successfully associated
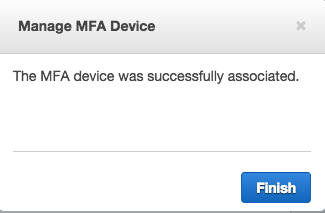
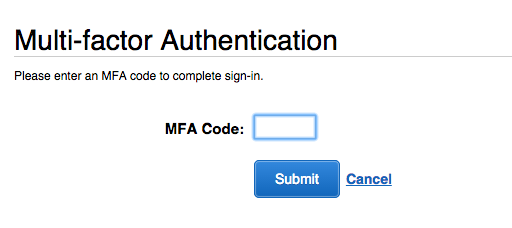
Congratulations! You now have a Google Authenticator assigned to your account and have protected it with MFA login. To test this logout of the console and back in again
This time you should be presented with an MFA Login Screen. At this point simply enter the numbers shown on your virtual device, click submit and you should successfully login.
Conclusion
In the example above I have shown how you can protect your login to the AWS Management Console using a virtual MFA Google Authenticator device. By performing this action we have added a much stronger layer of security over traditional based password login and one which I would recommend for all users logging into the console.
We have used Google Authenticator in the above as it’s a very popular TOTP device. However any device that conforms to RFC6238 should work just as well.
Finally I would add that the above example is not recommended to secure the top-level (root) account. Instead, for root, purchase a hardware MFA device (as these are tamperproof) and lock it in a safe and use it only when absolutely necessary.
More Information
The following links will provide you with more information related to what we have discussed here:
About Hydras
Hydras are a team of cloud consulting experts that excel in architecting and operating secure, automated cloud based solutions built on Amazon Web Services (AWS) with a particular focus on web and mobile. Contact us for help with your AWS projects. We’d love to work with you.